Ways to prevent frozen pipes (and what to do if they freeze anyway)
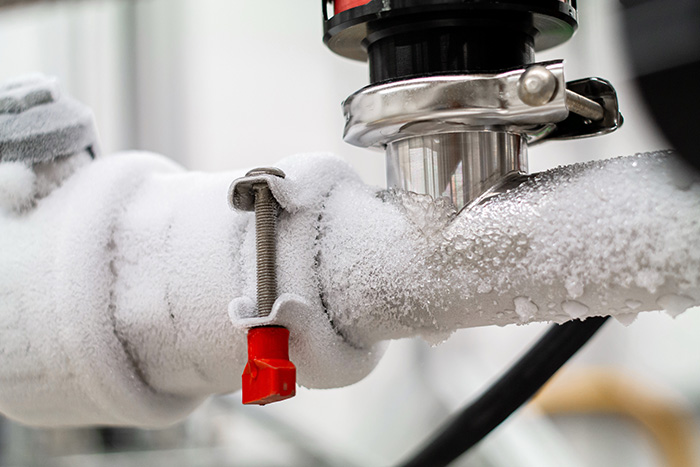
Is your home at risk for frozen pipes? Water damage caused by burst pipes is a real threat during harsh Canadian winters. Here’s your guide to reducing the risk of your pipes freezing—and tips for thawing them out if they do.
5 tips to prevent your pipes from freezing
1. Drain outside water lines
Water lines in unheated or uninsulated areas are most at risk for freezing. Before winter arrives, turn off and drain outdoor water lines.
2. Keep the heat on
Keep the temperature in your house above 21 oC, particularly during extreme cold. Many of us turn the heat down at night to save energy, but it’s best to avoid this when very cold temperatures are in the forecast. You can save yourself a costly water damage repair and insurance claim.
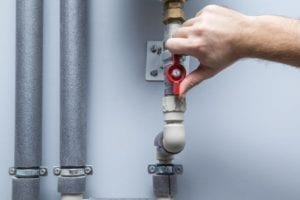
3. Keep a tap dripping
Pipes can burst when water freezes and then expands. But water won’t freeze as easily if it’s running. When the weather is bitterly cold outside, leave a cold water tap dripping—the bathtub faucet is best. If you notice the water pressure dropping, it’s a sign your pipes are starting to freeze.
4. Keep interior doors open and garage doors closed
To make sure heat circulates freely, keep bathroom doors open. If you have water pipes in your garage, keep the garage doors closed to prevent freezing.
5. Think about prevention before you go away
No one wants to come back from vacation to a flooded house, so prep your home before you leave for a long period of time:
- Turn off the water main to drain the water pipes.
- Starting at the top floor of the house, turn on all the taps and flush the toilets.
- Drain your hot water tank—turn off the inlet valve, attach a hose to the tank drain and run the water into the basement floor drain.
- Unhook your washing machine hoses and drain them.
- Ask a friend to check on your house—your home insurer might require this.
- Keep the heating set to a temperature only a few degrees lower than usual.
- Open kitchen and bathroom cabinet doors, as well as closet and attic doors, so warmer air can circulate.
Extra steps you can take to prevent damage

Move exposed pipes
Ask a professional to relocate exposed pipes to protect them from freezing, especially if you’ve had issues with frozen pipes in the past.
Insulate pipes
Insulate water pipes in unheated areas of the house, like the basement, garage, and attic. Insulated pipes help reduce heat loss and keep water from freezing when temperatures drop. Doing this can also help cut your heating bill.
Thawing frozen pipes
Despite your best efforts, your pipes can freeze during an exceptionally cold spell. If you turn on your taps and only a trickle of water comes out, or the water pressure suddenly drops, you might have a frozen pipe. Here’s what to do:
- Shut off the main water valve.
- Warm the frozen pipes with a hair dryer, heating pad or portable space heater. Don’t use a blowtorch—it could damage plastic pipes or cause a fire.
- If you can’t reach the frozen pipe, or it won’t thaw, call a licensed plumber.
- Keep the nearest faucet turned on while treating a frozen pipe. As it melts, water will begin to flow through the faucet.
- Check the other faucets in your home—if one pipe freezes, others might too.
- Before turning on the water again, check for broken or damaged pipes—when in doubt, call a plumber. Better to spend a little money making sure everything is alright than risk more damage to your home.
- If you do have water damage, call us for more information.
If you’re a policyholder with The Personal, protect your home with the Alert program. You’ll get alerts on your phone if there’s a water leak or a risk of freezing. And if you’re away on vacation, you can get alerts sent to a relative or friend.
Comments Off on Ways to prevent frozen pipes (and what to do if they freeze anyway)
Signs You Need A New Toilet
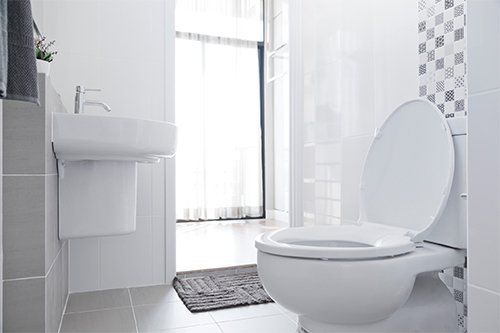
You rely on your toilet daily, but you probably don’t think much about it until something goes wrong. Just like other major appliances in your home, your toilet will probably need to be replaced after years of use. How do you know when it’s time to call a plumber to install a new toilet?
- There are cracks in your tankIf you frequently see a puddle of water around your toilet, this could be more than a simple leak: You could have cracks in your tank, and the toilet may need to be replaced. A plumber can help you determine if it’s an issue that can be repaired. If the toilet appears to be working properly – flushing well, not clogged, not running – but there is water around the bottom of it, that could mean there are cracks in the bowl.
- You have an old toiletRegardless of whether your toilet is working properly, if you have had the same one for decades you should consider replacing it. Older toilets are likely to be less efficient than newer ones, which means they could be driving up your water bill. Advancements made in the past few years have resulted in toilets that use significantly less water. Current Federal law requires residential toilets (flush tank type) manufactured and sold in the U.S. after Jan. 1, 1994, to use no more than 1.6 gallons per flush, and some newer toilets use even less. If your toilet has not been replaced since 1994, it may be time for a new one. When shopping for a more efficient model, you may want to consider one that offers dual-flush technology. This gives you the option of a partial flush for liquid waste and a full flush for solid waste, so you can use less water while still flushing every time.
- You feel it wobbleA toilet that wobbles or rocks are not normal. If your toilet is unsteady, call a plumber right away to evaluate the problem. While it could be a simple matter of tightening some bolts, it could also mean that the floor underneath is damaged or rotting and you’ll need to have it professionally repaired.
- You’ve had to fix it oftenIf you’ve had to call a plumber several times in the past few years to have your toilet repaired, it may be time to purchase a new one. It will likely save you money in the long run.
- You have a round bowlWhile there’s nothing drastically wrong with your round bowl, replacing it with an elongated model is worth considering. These types of bowls tend to be more comfortable than round ones because they allow for more seating room. An elongated bowl also stays cleaner and allows fewer odors to escape, according to Consumer Reports. Round bowls do have a slightly smaller footprint, but if you have room, consider making the switch.

Give your local Benjamin Franklin® plumbers local Benjamin Franklin a call if you see any of the trouble signs, or if you’re interested in replacing your old toilet with a newer model.
Comments Off on Signs You Need A New Toilet
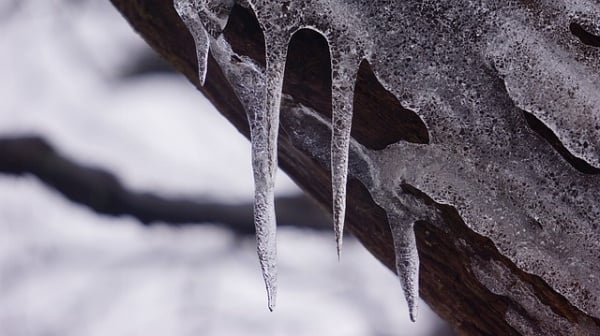
6 Great Tips to Keep Pipes From Freezing
:strip_icc():format(webp)/stop-freezing-pipes-2124982-revision1-5c01a886c9e77c0001439273.png)
Cold temperatures can cause water pipes to freeze. Freezing in a pipe creates a lot of pressure inside the pipe and can cause the pipe to burst and likely lead to serious flooding, especially when there’s no one around to turn off the water. The best prevention against frozen pipes is to keep them warm enough to stay above the freezing point. You can do this with any one of six simple steps or, better still, a combination of measures.
Not Just for Cold Climates
It is a common misconception that frozen pipes are an issue only for homes in typically cold climates. However, the homes that are actually more vulnerable to frozen pipes are those in typically warmer climates because the pipes may not be properly insulated against frigid temperatures, or they may be located in unprotected areas (or even outdoors). Abnormally cold weather puts these pipes at risk.
Wherever you live, you need to worry only about the water supply pipes, not the drain pipes. Water pipes are small, only about 1 inch in diameter or smaller. Drain pipes are 1 1/2 inches and larger and are usually made of plastic. Drain pipes carry waste water, but they do not hold water and are not pressurized like water pipes, so freezing inside drains is not a concern.
Tip #1: Keep the Heat On
If you or your tenants are leaving for a long period of time, make sure that the heat is kept on in your property. It may be difficult to convince your tenants to leave their heat on when they are away, especially if they are responsible for paying their own utility bills. You should inform them that the heat can help prevent pipes from freezing, and if pipes freeze and burst, it can cause a lot of water damage to the property and to their possessions.
The heat does not have to be kept as high as you normally would keep it if you were actually in the property, but keeping it set above 50 F is a good idea. This should provide enough heat to keep the pipes warm and to prevent any water inside from freezing.
Tip #2: Allow the Faucet to Drip
If you are afraid a pipe will freeze, you can open the faucet fed by that pipe just a bit so the faucet drips slightly. Allowing the faucet to be open like this relieves pressure in the system. If a pipe freezes, it is actually the pressure that is created between the blockage and the faucet that will cause the pipe to burst. Allowing the faucet to be open will prevent this pressure from building up and thus keep the pipe from bursting. If the faucet is served by both hot and cold water pipes, open both faucet taps slightly, or set a single-handle faucet (such as a kitchen faucet) to warm.
Tip #3: Keep Interior Doors Open
Pipes are often located in cabinets. When the temperature drops, it is a good idea to keep these cabinet doors open so that the heat from the rest of the house can keep the pipes warm as well. You should also keep all interior doors open so that the heat can flow throughout the home.
Tip #4: Seal up Cracks and Holes
Seal gaps around holes where pipes run through walls or floors, especially where the hole is letting in cold air. Use caulk or spray foam insulation (such as Great Stuff) to fill the gaps. If possible, seal holes on both the interior and exterior side of wall or floor. Cold outdoor air that gets in through holes and gaps can make a cabinet compartment, which is usually pretty cold, even colder.
Tip #5: Apply Heating Tape

Heating tape works like an electric blanket for pipes, supplying heat directly to the pipe to keep it warm curing cold spells. This can be a good solution for short sections of pipe that are at high risk for freezing and are easily accessible so you can install the tape and can monitor it for problems.
There are two types of heating tape. One type turns on and off by itself when it senses heat is needed. The other type must be plugged in when heat is needed and unplugged when not in use; it does not have an automatic or manual on/off switch. Much like a space heater, these products can be dangerous, so you must follow the product’s direction and safety procedures exactly.
Tip #6: Add Extra Insulation
Pipes that are located in areas that do not have proper insulation, such as basements or attics, may need extra insulation to keep from freezing. Pipes in basements or attics are not the only ones that may not be properly insulated from the cold. If you have had a problem with pipes freezing anywhere in your home, extra insulation could be the cure.
Pipes can be fitted with foam rubber or fiberglass sleeves to help decrease the chances of freezing. This can be an easy solution for pipes that are exposed but can get expensive if walls, floors, or ceilings have to be opened in order to properly insulate the pipe. Additional insulation can also be added to walls and ceilings to keep the pipes warm.
Insulation can help keep a pipe closer to the temperature of the water inside the pipe, but it does not add heat to the pipe and will not prevent freezing if the pipe is exposed to prolonged freezing temperatures.
Comments Off on 6 Great Tips to Keep Pipes From Freezing
4 Ways To Adjust Water Level In Toilet Bowl

If the water in your toilet bowl is too high or too low, it is important to find out why and fix the problem. Fortunately, the causes and solutions are generally quite simple, and you probably won’t need to call a plumber – so here are 4 ways to adjust the water level in a toilet bowl.
If you want a few extra tips, you can check out this useful and sometimes amusing video too.

Too High Or Too Low?
The correct way to adjust the water level in your toilet bowl depends on whether it is too high or too low. Let’s look at the different techniques for each situation in turn.
If The Water Level Is Too High…
1. Unclogging pipes
With any kind of flushing toilet, if the water level in your toilet bowl is too high, the chances are that this is due to the pipes being clogged. When you flush your toilet, water can’t flow out as it should and so simply sits in the bowl.
Sometimes, the water level will gradually drop as the water flows out slowly – but with bad blockages, the water will remain in the bowl indefinitely.
Worse, if you continue to flush the toilet, the water will eventually overflow the bowl and toilet seat and end up all over your bathroom floor.
If you suspect this is the problem you are dealing with, there is a quick test you can do. Fill a bucket with water and pour it into the toilet bowl. If the water remains in the toilet bowl without flowing out, it is safe to assume you have a blockage.
To resolve the problem, you can first try putting on a pair of rubber gloves and reaching into the toilet bowl to see if there are any larger items like diapers or tampons blocking the toilet.
If you don’t find anything, the blockage may be further down the pipe, so the next step is to try unblocking it with a plunger.
If the plunger doesn’t do the job, you may consider pouring boiling water into your toilet or using chemical products to unblock it – and if none of these techniques works, it may be time to call in a professional.
If The Water Level Is Too Low…
2. Adjusting the water level in the tank
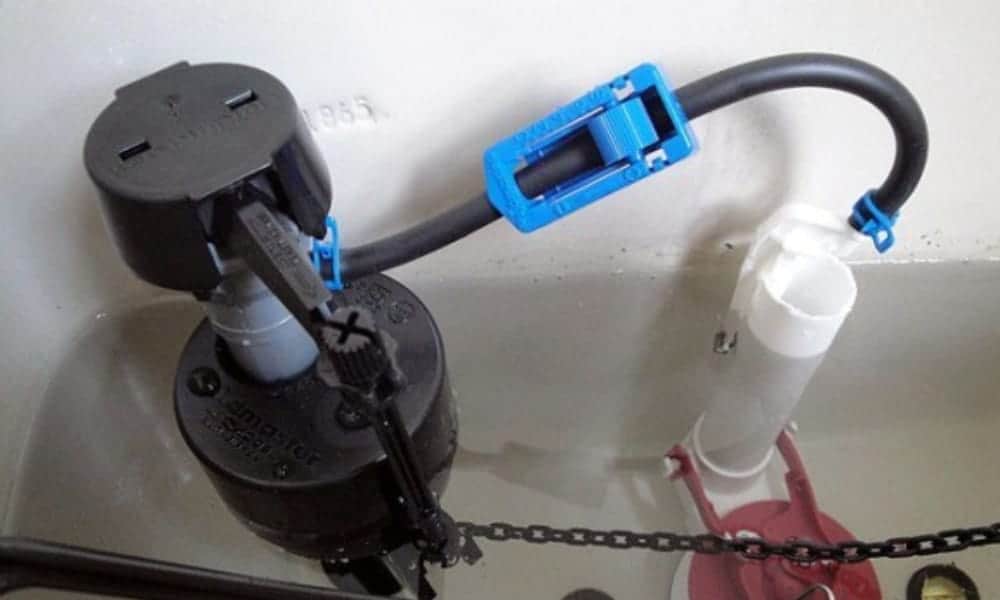
If the water level in your toilet bowl is too low, there are several possibilities, but the most common reason will be related to what’s going on inside your toilet’s tank, so this is what you should check first.
Start by removing the tank lid and setting it aside and check the level of the water in the tank. It should be about an inch below the level of the fill valve and overflow tube, and if it is significantly lower than this, you will need to adjust the water level in the tank.
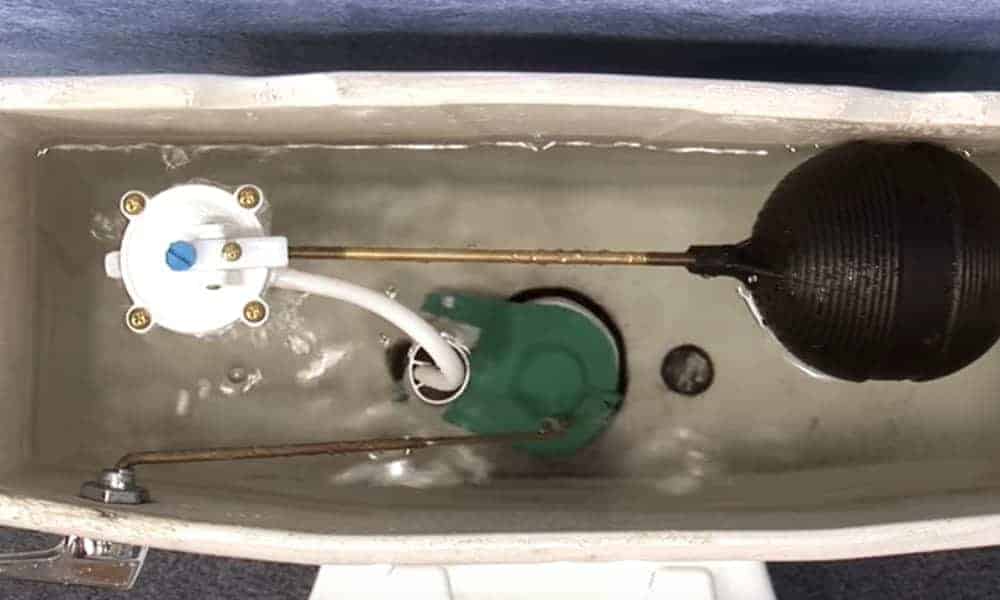
There are several variations on toilet tank mechanisms, but most use a float – either in the form of a ball or a cylinder – to control the level of the water
Whichever type you have, the first step is to turn off the water supply to the toilet. Find the external water valve and close it, then flush the toilet to remove all water from the tank. If the valve is closed correctly, the tank won’t refill again.
If you have a ball version, check that it isn’t damaged. If it is damaged or there is water inside the ball, it will need to be replaced.
If everything looks to be in working order, simply adjust the height of the ball as necessary – there should be a screw that allows you to do this.
Once you have made the necessary adjustments, turn the valve back on, allow the tank to fill, flush the toilet and check to see if the water level is now where it should be.
With a cylinder version, the process is almost identical. To adjust the height of a cylinder float, there should be a screw that you turn to move it up or down. When you have adjusted as necessary, fill the tank and flush to test.
3. Clear the plumbing vents
If the problem doesn’t come from the tank, there could be an issue with the plumbing vents in your home.
In a properly functioning plumbing system, vents allow air in to maintain the correct pressure. If the vents become blocked, air can’t enter, and the water won’t flow properly.
The concept is the same as the old college trick of inserting a straw into a beer bottle when trying to drink it as quickly as possible. The straw allows air to enter the bottle, letting the beer flow out in only a few seconds.
The tell-tale sign that suggests you might have blocked vents is that your toilet gurgles and splutters when you flush another toilet in your home or empty the bathtub.
If this happens, you might try climbing onto your roof and flushing your pipes out with water from a garden hose.
If this is a recurring problem in your home – perhaps due to falling leaves – it might be worth considering investing in some kind of cover for your vents to prevent leaves or other detritus from blocking them again in the future.
4. Cracked toilet
If you can’t find any other reasons for the low water level in your toilet bowl, check for hairline cracks. If you find the water level drops gradually after each flush, this is a sign that you might be dealing with a leak of some kind.
Another giveaway is if you find puddles of water on the floor – although the leak or crack could be below the floor level, so puddles of water won’t always be visible.
If your toilet is cracked or you have any other kind of leak, it is important to fix it as quickly as possible since this can lead to serious structural damage in your home that will be expensive to repair later if you don’t catch it in time.
With this kind of problem, you may find your only option is to replace the whole toilet.
Resolve The Problem Quickly
As with most plumbing issues, the key is identifying the cause early and taking action. If you put the repairs off until later, the problem will only get worse – and you may find you need to spend a lot more money fixing it than if you had taken action when you first noticed the issue.
Comments Off on 4 Ways To Adjust Water Level In Toilet Bowl
Five Signs Your Home Needs a Main Water Line Repair

You are probably pretty familiar with the pipes under your sink or the drain in your shower, but you’ve likely never given a second thought to the pipes that connect your home to the public water and sewer system. Those pipes pull heavy duty for your home. Check out these five signs you have a problem with your home’s main water line.
- Your water bill increased significantly.
Summer water bills are often higher than normal because of watering the lawn, filling the pool, and even showering more frequently. But, if your water bill seems out of the ordinary, you may have a leak in your main water line.
- You are hearing strange sounds coming from several of the pipes in your home.
Are your pipes talking to you? If you are hearing gurgling from your sink when you flush the toilet or the reverse, that’s a sign of a more systemic plumbing issue.
- You’re finding sinkholes or cracks in your foundation?
A leaking main water line can be the cause of major damage to your home’s structure and a source of erosion of your landscape.
- Your home has low water pressure at all the faucets.
Low water pressure can be a sign that your main water line is clogged. Clogs can happen from household waste and also from tree root infiltration. Both a clog and tree roots can put pressure on these pipes and create cracks. If not addressed these cracks can evolve into a full break of the line. Did you know the repair of a water line break outside your home is the homeowners’ responsibility?
- Your water is cloudy.
While there are a few different causes of cloudy water which can include a problem with that particular fixture or issues with your water heater tank, cloudy water can also be caused by disintegrating or damaged pipes.
If your home is experiencing any of these issues, you might have a problem with your home’s main water line. At Len The Plumber, our experts can get to the root of the problem using diagnostic cameras and the most advanced plumbing tools. And, we have the experience to make sure we repair or replace your main water line quickly to minimize the damage and restore your confidence.
Contact us to schedule a main water line service today. From D.C. to Baltimore, Northern Virginia, Delaware and the Philadelphia area, just call Len The Plumber, your local plumber with same-day service, 7 days a week!
Comments Off on Five Signs Your Home Needs a Main Water Line Repair
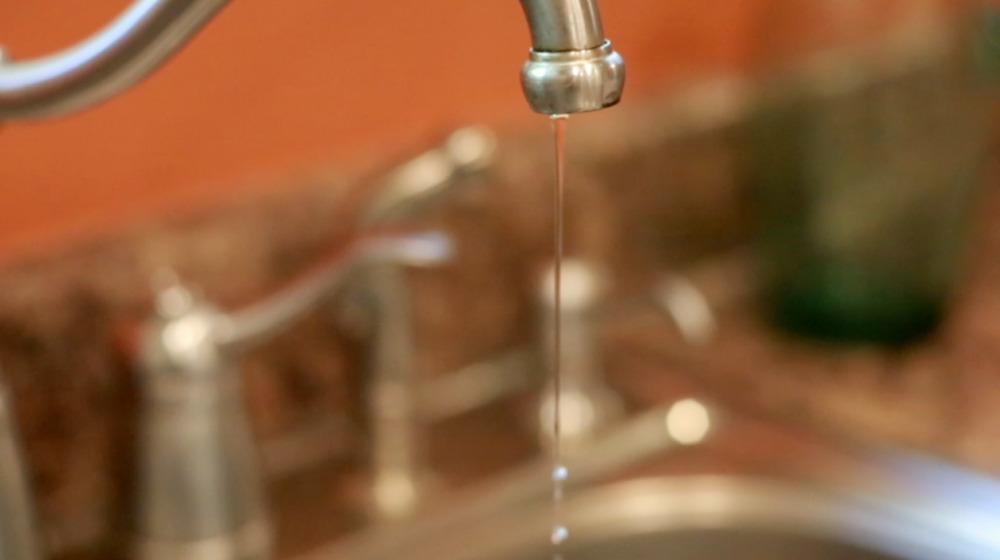
5 REASONS YOUR FAUCET IS DRIPPING WATER & HOW TO FIX IT
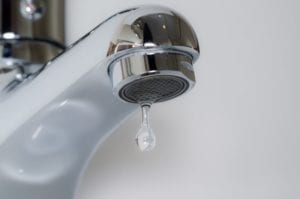
Did you know that a leaking faucet can waste up to a hundred dollars worth of water? And that’s just a minor leak. A larger faucet leak can waste more than 30 gallons of water a day, putting a significant dent in your wallet. To help you save money, we have compiled a list of 5 causes of leaky faucets and how to fix them.
5 CAUSES OF LEAKY FAUCETS
There are many more causes of leaky faucets than you might think. Here are the main five causes:
A DAMAGED CARTRIDGE
If you have a faucet with two handles, one for hot water and the other for cold, then you have a cartridge-style faucet. The cartridge is a valve on each handle that controls the flow of the water into the faucet spout. If your faucet is dripping water, this is a sign of damage to the cartridge.
BROKEN WASHERS
A common cause of a leaking faucet is broken washers. Washers rest against the valve seat, and over time, friction can cause the washers to wear out. This then leads to leaking. If a washer is the wrong size or not installed properly, it can also lead to leaking.
WATER PRESSURE
If you notice that the faucet in your bathroom only drips water during certain times or when your faucet’s handles move a certain way, then it could be your home’s water pressure that is causing the leaks.
MALFUNCTIONING O-RING
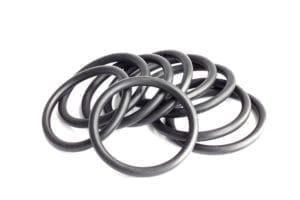
An O-ring is located in the sink’s faucet. It is a small disc that is attached to the stem screw to hold the handle of the faucet in place. Similar to washers, O-rings can get worn out or loose. If one of your faucet’s handles is leaking, this is probably the cause.
DETERIORATED VALVE SEAT
If your faucet is leaking from the spout, then it could be the valve seat. The valve seat connects the faucet to the spout. Sediment can build up and corrode the seat, causing a leak.
HOW TO FIX A LEAKY FAUCET
Save yourself some money by fixing a leaky faucet yourself. Be your own repairman—or repairwoman—and follow these steps:
DEACTIVATE THE WATER
One of the most important steps in fixing a leaking faucet is to turn off the water. If you do not shut off the water to the sink, you could end up flooding your bathroom. To shut off the water, look for the fixture shutoff valves below the sink and turn the handles clockwise. If your faucet doesn’t have any shutoff valves, turn off the main water supply for the house. Check to make sure that the water is off by turning the faucet on. If no water comes out, then you did your job.
DISASSEMBLE THE FAUCET HANDLES
The way to remove the handles of a dripping faucet depends on the type of fixture. For standard fixtures, you can use a flathead screwdriver to remove the caps on top of the handle, revealing handle screws. Unscrew these and pull the handles off.
DETACH THE VALVE STEM
Once the faucet handle is removed, you will see the inner valve stem or cartridge. This also needs to be removed. Compression faucets have a brass valve stem that can be unscrewed. Cartridge faucets can be pulled straight out. If you are having trouble, you can refer to your faucet manual or look up instructions online.
INSPECT THE PARTS OF THE SINK
Once you have taken all the parts out, carefully inspect them to confirm what needs to be replaced to fix the leaking faucet. You should see rubber washers, O-rings, and seals.
REPLACE THE DAMAGED PARTS
If any parts are old or worn out/damaged, replace them. Go to your local hardware store and find the parts you need. The best and easiest way to get the right parts for your dripping faucet is to bring the old ones into a hardware store and ask for exact duplicates.
SANITIZE THE VALVES
Look at the valve body after you have removed the stem or cartridge. Usually, there tends to be mineral buildup. To clean it, pour white vinegar over the valve seat and let it soak for a couple of minutes. Then scrub it away, and scrub the other parts of your sink to restore its shininess and smoothness.
PUT THE FAUCET TOGETHER
Once you have the new replacement parts and have cleaned everything, reassemble the faucet. Turn the water supply on and check for any leaks.
4 TYPE OF FAUCETS
Knowing the 4 common types of faucets will help you know how to disassemble and fix them if need be.
CARTRIDGE FAUCETS
Cartridge faucets are commonly found in bathrooms and are characterized by the two handles on either side of the spout. The handle moves up and down to turn the water on or off. The inner workings of the sink contain a cartridge that moves up and down to control the flow of water.
DISC FAUCETS
Disc faucets are newer faucets, and typically a bit more expensive than other standard options. They are extremely durable and reliable. Disc faucets have only a single lever to operate them. The lever sits atop a cylindrical body.
BALL FAUCETS
These faucets use a ball joint to control the hot and cold waterlines. They are characterized by a single handle on a rounded cap mounted on top of the spout. To work them, you push up and down to adjust the pressure, then left or right to adjust the temperature. They’re common in kitchens and other high-use areas.
COMPRESSION WASHER FAUCETS
Although they are the oldest type of faucet, compression washer faucets are still commonly used today. They use rubber washers to tightly seal against the flow of water. They have two handles that do not move up or down, only side to side. The most identifiable trait of compression washer faucets is that you can feel the handle of the faucet getting tighter as you shut it off.
FAUCET & PLUMBING INSTALLATION SERVICES
If you cannot fix a leak in your faucet, give our team a call us. We offer emergency plumbing services and will address the situation quickly. Once we discover the source of the problem, we will let you know the parts and components that need to be replaced to fix the dripping faucet. Do you need help with a different plumbing problem? In addition, to fixture repair solutions, we offer other types of services such as water heater repair and sump pump installation. You can trust the team of our licensed plumbers.
Comments Off on 5 REASONS YOUR FAUCET IS DRIPPING WATER & HOW TO FIX IT
Top 9 Causes of Copper Corrosion in Home Piping Systems
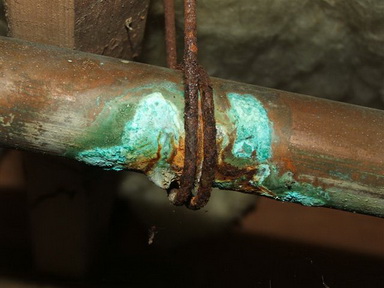
According to some estimates, copper corrosion costs the United States more than $1 billion a year.
Copper corrosion in home plumbing systems is a common phenomenon that can have many causes.
Besides actual piping failure, the telltale blue stains the oxidized copper leaves on sinks, tubs, and fixtures can identify copper corrosion.
Often laundry and even blonde hair can be tinted blue. Copper can be toxic, and water-containing levels over 1.0 mg/L should not be used for drinking.
If there are iron pipes present, the water can be colored rust or reddish and contain metallic or sulfur odors and sediment. Corrosion can cause the piping to fail, sometimes in less than 10 years!
What is Corrosion?

Corrosion is “the deterioration of a substance or its properties due to a reaction with its environment.” In plain words, the metal from the piping dissolves into the water as a result of various causes, causing pipe failure and corrosion of water heaters, appliances, and fixtures.
In plumbing systems, corrosion is due to physical and chemical reactions between the pipe material and water.
(If want to learn more about Copper Corrosion and water, check this post out.)
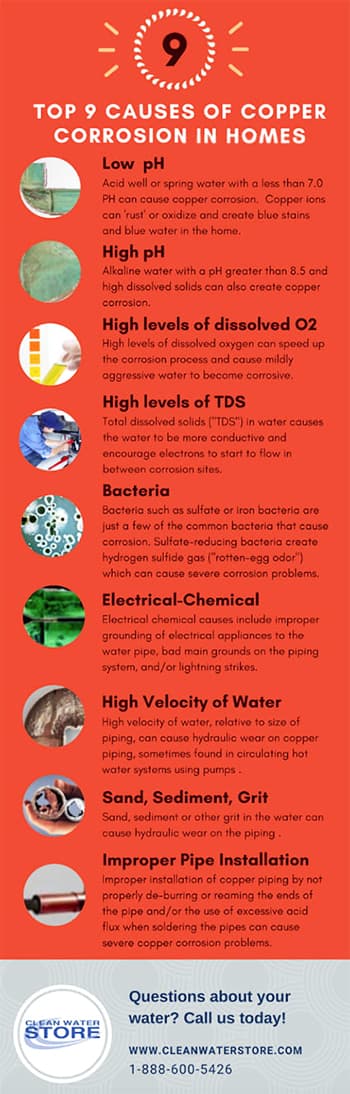
Top 9 Causes Of Copper Corrosion Problems
1. Low pH (acid water less than 7.0)
2. High pH (alkaline water greater than 8.5)
3. High levels of dissolved oxygen
4. High levels of salts dissolved in the water (total dissolved solids)
5. Corrosion-causing bacteria such as sulfate or iron bacteria
6. Electrochemical causes, such as improper grounding of electrical appliances to the copper piping, and/or lightning strikes through utility poles grounding wires
7. High velocity of water, relative to the size of piping, causing hydraulic wear on the piping, sometimes found in circulating hot water systems using pumps
8. Sand, sediment, or other grit in the water causing hydraulic wear on the piping
9. Improper installation of copper piping by failure to properly de-burr or ream the ends of the pipe and/or the use of excessive acid flux when soldering the pipes.
What Can Be Done to Stop Copper Corrosion in Homes
- Identify the source and severity of the problem by inspection of the piping system and getting an accurate water analysis, especially if you are on well water.
- Verify if there are unnecessary electrical appliances or wiring connected to the piping and if the piping system is properly grounded to earth ground. Verify to make sure that there is electrical continuity throughout the piping system. For instance, the copper piping should not be separated electrically by plastic water filters, sections of plastic pipe, plastic water softener bypass valves, etc. Install jumper cable around these items.
- Get a Corrosion Test Kit with Copper TestsCheck for pH, hardness, alkalinity, temperature, and total dissolved solids, and calculate LSI (Langelier Saturation Index) to see if the water is aggressive or corrosive.
- Cut out sections of the copper piping, cut in half, and inspect the type of corrosion present and for signs of poor workmanship by the installers. Replace copper pipe if necessary.
- Install a calcite neutralizer tank, or a soda ash feeder to raise the pH to 7.2 to 8.0 to correct for low pH and increase the alkalinity in the water.
- Set up a phosphate feeder before the copper piping. Phosphate can coat the piping and reduce corrosion effects by coating the interior surfaces of the piping with food-grade phosphate, causing an insulation surface to be built up.
- In case of high total dissolved solids (over 1000 ppm) install a whole house reverse osmosis system, followed by a calcite neutralizer.
- Install a chlorinator or ozone system to disinfect the water before it enters the home if your water has bacteria and/or sulfur odors.
- On City Water? If your water is supplied to you by a municipal utility, then the first place to start is by calling your water utility and reporting the problem. If this is an isolated case and none of your neighbors are having a corrosion problem, you should suspect that the cause is either improper grounding, stray currents, or improper installation of the copper pipe. Get a good home test kit with copper tests so you can do your own testing at home.
- On Well Water? The first task you should do, if you take your water from a private well, is to get an accurate water analysis. The water analysis should be for pH, total hardness, alkalinity, total dissolved solids, iron, manganese, nitrate, chloride, sulfate, and copper. Measure temperature as well.
More ways to prevent corrosion
Plumbing engineers and system designers can significantly reduce pipe corrosion by making simple design adjustments.
- Minimize velocity. Use larger diameter piping to keep velocities low:
Cold line velocity should be less than 8 feet per second
Hotlines should be less than 4 feet per second.
- Minimize hot water temperature. Make sure return lines in a circulating hot water system have the same diameter as the supply lines.
- Avoid stagnant sections; minimize direction and size changes.
- Specify low-corrosivity water-flushable fluxes
- Avoid stagnant sections
- Minimize direction and size changes
- Prevent electrical currents by grounding directly to a copper rod driven into the earth. Do not attach a grounding wire to water pipes other than the main pipe ground. Route wires away from water pipes and don’t use galvanized nails that touch copper piping. CAUTION: This may need to be done by a qualified electrician.
- Avoid induced stresses – provide enough pipe support and allow for thermal expansion.
- Consider non-copper pipe (e.g., PEX or stainless steel) wherever its use is permitted.
- Use non- or low-lead faucets, valves, and appurtenances. Use low-flow fixtures and appliances and aeration faucet outlets.
- Choose fluxes that meet ASTM B813 standard.
- Specify that copper tube and fittings be installed according to ASTM B828-92 standards
- Emphasize careful reaming of the cut ends to reduce turbulence. Plumbing inspectors and the Copper Development Association both report that un-reamed tubing corrodes and fails much more quickly than tubing which is properly reamed.
- Use correct ASTM B813 fluxes. Using excess flux or a corrosive flux cause early pipe failures.
Comments Off on Top 9 Causes of Copper Corrosion in Home Piping Systems
Handy Plumbing Tips and Tricks
Here are nine of our favorite simple tricks and tips to save you plumbing headaches around the house.
 To save you time, money and headaches down the road, we collected our favorite tips and tricks for solving common household plumbing problems. Most of these tips make use of things that cost less than $20 and these tips could save you an expensive service call.
By the DIY experts of The Family Handyman Magazine
Stop sink-sprayer hang-ups

Use pipe insulation to prevent sprayer snarls
If you have to jiggle the hose as you pull out your kitchen sink sprayer, chances are the hose is catching on the shutoff valves. For smooth operation, slip 1/2-in. foam pipe insulation over the pipes and shutoff handles. Tape it if it won’t stay put. Get the insulation at home centers for about $3.
Silence creaking pipes
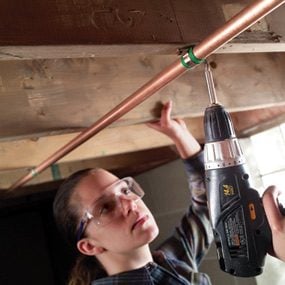
Wrap pipes in adhesive-backed felt
Running hot water can cause copper pipes to expand and grind against pipe hangers and joists. So pick up some adhesive-backed felt at the hardware store and cut it into strips. Then remove each hanger and wrap the pipe before refastening the hanger.
Quiet loud sinks
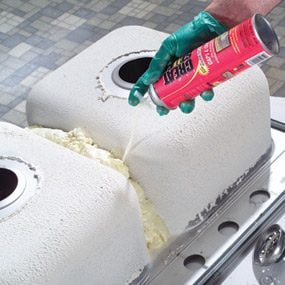
Deaden sounds with expanding foam
Fill the space between two stainless steel sink basins with expanding foam. The foam deadens vibrations and lessens the gong effect. It’s possible to do this with the sink in place but much neater and easier before installation. Either way, let the foam harden and then trim away the excess with a knife.
Drain vacuum
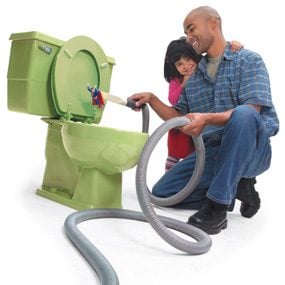
Use a shop vacuum to remove hard objects
When a hard object like a toothbrush, comb or toy plugs a toilet or drain, a plunger may not be the solution—it might only push the obstruction in deeper. Instead, suck out the water and the obstruction with a wet/dry shop vacuum.
Pipe orienteering
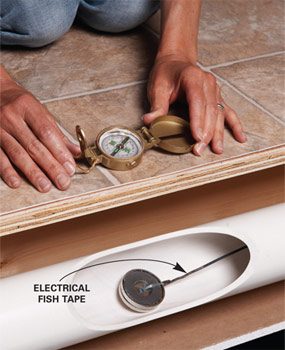
Use a strong magnet to find hidden pipes
When trying to locate a pipe under the floor, attach a rare earth (neodymium) magnet to an electrical fish tape and feed it into drain lines through the cleanout plug. Locate the magnet (and the pipe) under the floor using an ordinary compass, which will turn wildly when it finds the strong magnet.
Bucket flush
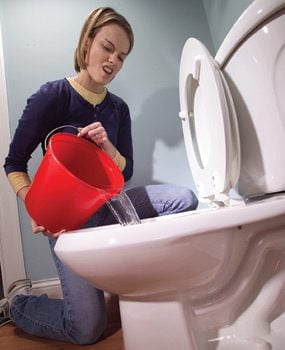
Use a bucket of water to flush the toilet
You don’t have to run to the neighbor’s bathroom during a plumbing project. Before you turn off the water supply, fill 2- gallon buckets with water. Flush the toilet by dumping the water in the bowl. You’ll get one flush per bucket. Works just as well as the usual method, although it won’t refill the bowl.
Next best thing to X-ray vision
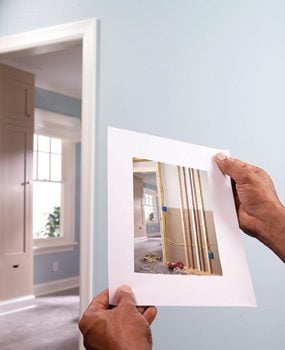
Take a picture before closing up walls
Your walls may not have much inner beauty, but it’s a good idea to take pictures of what’s inside during remodeling. The same goes for floors and ceilings. When your next remodeling or repair project rolls around, you’ll know where the framing and the electrical and plumbing lines are.
Empty the trap
Plunge water first before removing the trap
Before you remove a sink trap, give the drain a few plunges with a toilet plunger. This will push most of the water out of the trap, lessening the mess when you pull the trap. If you have a double sink, be sure to plug the other drain to contain the air pressure. If the strainer isn’t a screw-down style, you’ll have to hold it down while you plunge the drain.
Inside view
Get a look at hidden spaces
Whether you’re remodeling or just running wire, knowing what’s inside the walls is helpful.
Comments Off on Handy Plumbing Tips and Tricks
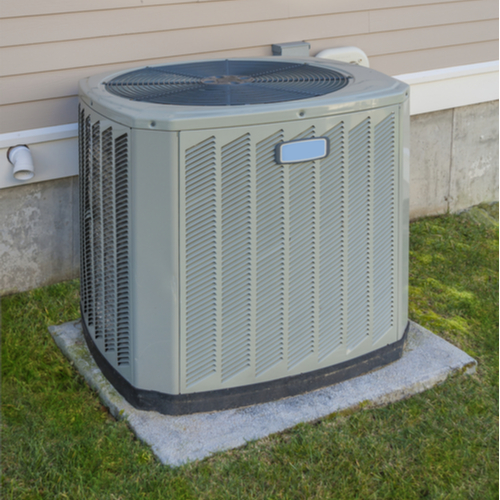
How Air Conditioning Works
June 4, 202
Before 1902, humans adopted creative ways of staying cool during hot summers. The ancient Egyptians hung wet reed mats in their windows that created a cooling effect when the wind blew through. Ancient Romans went so far as to pump cold water from aqueducts through the walls of elite homes.
These days you need only turn your thermostat dial for sweet heat relief in your home. But what exactly happens when you turn that magic dial? And how do you fix your AC when it doesn’t click on? Mike Diamond is the fresh smelling man with the answers to all things cool. We’ll cover the parts of a home ac system and explain how the air conditioning system in your house works. If your AC isn’t working, we’ll troubleshoot the common reasons why.
Who invented Air Conditioning (and the summer blockbuster)?
The man credited with inventing air conditioning as we know it is Willis Carrier. At the turn of the 20th century, he had an epiphany while standing on a train platform. He realized that humidity could be removed from air causing it to feel colder. Willis built a system of ice chilled coils that kept mills and printing companies cool during hot industrial workdays.

Stuart Cramer invented a ventilation device around the same time that was used in textile plants to distribute cool vapor to hot air. He was also the person to coin the term “air conditioning.” In 1925 he invented a more efficient version of his device for a movie theater. Soon his device was in theaters across the country. Ever since, Americans have flocked to the movies to escape the summer heat and thus was born the summer blockbuster season.
How Does Air Conditioning Work?
Modern air conditioning works via the physical principal of phase transition. This law states that when a liquid converts to a gas, it absorbs heat energy. Like when you boil water to create steam.
The liquid in this instance is a refrigerant or chemical compound that evaporates and condenses over and over to cool your home. The refrigerant starts as a liquid that travels through an evaporation coil inside your home. As the liquid evaporates it absorbs heat and, in this case, that heat is from warm air from your home. As the heat is removed, the resulting cool air is distributed back into your home.
The used refrigerant gas is then sent to your air conditioner compressor – that’s the big unit outside – where it is compressed back into a liquid. The hot air that is a byproduct of the process (remember phase transition) is vented outside and the condenser aids the compressor in sending the liquid refrigerant back to the evaporator coil where the cycle begins all over again.
How HVAC Systems Work
HVAC stands for heating, ventilation and air conditioning. Your home’s central air takes advantage of the existing ducts and vents in your home that are also used by your furnace during colder months.
After warm air travels over the evaporation coil and is cooled, fans blow the chilled air through your ducts and vents to reach every room of your home. This network delivers cold air evenly and efficiently throughout your home.
The thermostat connected to your HVAC system regulates all temperatures for both your heating and air conditioning. Each system responds based on the setting you input. Having one central control makes it easy to stay comfortable all year long.
Why Won’t My Air Conditioner Work?
Like any piece of equipment, air conditioners are subject to break down and failure. Common reasons air conditioners malfunction include:

- No power.
- Blown fuse or tripped circuit.
- No signal from the thermostat.
- Too hot outside to keep up.
- Dirty or blocked air condenser.
- Dirty air filter.
- Broken fan.
- Problems with refrigerant.
- Unit not the right size for your home.
- Older unit (10+ years).
- Leaky air ducts.
Some of these issues are easier to address than others. If your air conditioner is not working, make sure its receiving power. Check that the circuit isn’t tripped and that your thermostat has fresh batteries. Then make sure your filter is clean and check your compressor for obstructions like brush or grass. If you’re still having problems, it may be time to have a professional technician look at it.
Comments Off on How Air Conditioning Works
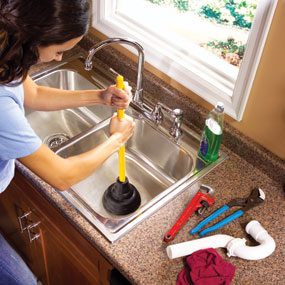
How To Use A Plumber’s Snake For Unclogging A Drain
A drain auger or plumber’s snake is a plumbing tool used to remove clogs that cause blockage within drain pipes.
Snakes are ideal for unclogging drains, especially when dealing with stubborn clogs that can’t seem to be removed by a plunger. Thus, if you have tried a plunger and it fails to solve the problem, your next bet should be a snake.

Snakes are more effective than plungers. However, they’re more challenging to use. For instance, using a snake improperly can damage the pipes and lead to major leaks.
You can avoid such problems by learning how to snake your drain the right way. Here’s what you need to know about snaking a drain.
How do snakes work?
Basically, a drain snake or auger is a flexible and long metallic cable with an uncoiled spring or small auger attached on the end that gets into the drain pipe. The other end of the cable has a handle.
The auger comes with the design of a corkscrew or drill bit. Plumber’s snakes used for domestic purposes measure approximately 50 feet in length.
The snake is usually coiled up when not in use. Most snakes used at home come with a manual, hand-operated crank or handle.
The snake works by getting into contact with the clog upon insertion into a drainpipe, thereby clearing the clog. The end with the auger is what you’ll insert into the clogged drain pipe.
You can insert the snake manually into a drain pipe and rotate the crank or handle to uncoil the snake. As it uncoils, the snake moves deeper into the drain until the auger penetrates through the clog and breaks it up.
Steps to Follow When Using a Drain Snake
Step #1
Wear some clothes that are meant for doing dirty work. Lay some rags or old towels below the drain pipe you’re unclogging.
The snaking process might get messy for some clogs, especially when you’re forced to remove a sink p-trap.
Step #2
Removing the p-bend or p-trap may be optional. The p-bend or p-trap is a curved component of a drain system that is found below the sink. The role of this component is to connect the sink drain to the main drain pipe.
It’s usually curved with the aim of preventing sewer smells from going up through the drain into your home. It’s usually made of plastic, but some may be metallic.
The sink p-trap can be removed manually by hands or using an adjustable pipe wrench. Inspect it carefully after removing it. Then clean it thoroughly.
If there are any obstructions, remove them. Doing so might eliminate the problem and save you from snaking the drain. Even when you fail to find anything in the trap, removing it will make the entire snaking work easier.
Step #3
You can also remove the drain trap arm. However, this is optional. The drain trap arm refers to the pipe section between the main drain pipe passing through the wall and the sink p-trap.
The arm keeps the trap well-positioned in place. It may curve through the wall as it connects to the main drain pipe. You can remove the arm by loosening the metallic or plastic nut that connects it onto the wall.
In case the arm doesn’t have a nut, then it might be held in place with glue. If it’s glued onto the wall, don’t remove it. Clean the arm thoroughly to get rid of any clogs.
Step #4
If it’s possible to remove the sink trap arm, then you’ll be closer to the main drain pipe. Try to look through the drain for obstructions.
In case you spot an obstruction, you can try to pull it out with a hanger wire. If you’re unable to remove it, then it’s time to use a snake.
Step #5
Thread the head of your snake through the drain pipe. In case you never removed the trap, then run some cold water through the drain while snaking.
Step #6
Avoid forcing the auger through the drain. Forcing it too hard may damage the pipe. Also, observe patience and ensure the auger and snake cable are not too lengthy for your drain pipe.
Step #7
Start uncoiling the drain snake by rotating the handle. Ensure the handle goes as close as possible to the pipe entrance. If the auger has more slack, then you’ll supply less force.
Keep rotating the handle. The pace at which you rotate it should be consistent. Avoid rotating it too slowly or too quickly. In case you feel some resistance while snaking, then you might have reached the clog.
Step #8
Upon getting to the clog, rotate the auger through the obstruction. Clear the clog thoroughly by breaking it up.
However, don’t jam the snake auger onto the pipe walls. In case of any scraping noises, stop working the snake until you re-adjust it.
In case you feel that the auger is stuck within the clog, pull out the snake from the pipe. The snake might pull out the stuck clog from the drainpipe. Work the snake until there’s no more resistance or when the drain snake uncoils fully.
Step #9
Pull out the snake. Then re-assemble all the sink drain components you had removed. Clean the auger of any clog remains.
Step #10
By now, the snake may have removed the clog successful. Check whether the sink is draining smoothly to know whether you’ve unclogged the drain.
In case the problem is yet to be solved, try snaking again. If the second round of snaking fails, then consider contacting professional plumbers.
Snaking is an easy DIY project that any homeowner can try. All you need to do is to know how you’ll use the snake properly to avoid creating new problems.
However, DIY snaking may not remove extremely stubborn clogs. If you’ve snaked your drain and the clog doesn’t clear, simply contact us for effective unclogging services.
We have all the required expertise and tools to trace and clear clogs regardless of how stubborn they might be. For more information, visit our blocked drains service page.
Comments Off on How To Use A Plumber’s Snake For Unclogging A Drain