6 Great Tips to Keep Pipes From Freezing
:strip_icc():format(webp)/stop-freezing-pipes-2124982-revision1-5c01a886c9e77c0001439273.png)
Cold temperatures can cause water pipes to freeze. Freezing in a pipe creates a lot of pressure inside the pipe and can cause the pipe to burst and likely lead to serious flooding, especially when there’s no one around to turn off the water. The best prevention against frozen pipes is to keep them warm enough to stay above the freezing point. You can do this with any one of six simple steps or, better still, a combination of measures.
Not Just for Cold Climates
It is a common misconception that frozen pipes are an issue only for homes in typically cold climates. However, the homes that are actually more vulnerable to frozen pipes are those in typically warmer climates because the pipes may not be properly insulated against frigid temperatures, or they may be located in unprotected areas (or even outdoors). Abnormally cold weather puts these pipes at risk.
Wherever you live, you need to worry only about the water supply pipes, not the drain pipes. Water pipes are small, only about 1 inch in diameter or smaller. Drain pipes are 1 1/2 inches and larger and are usually made of plastic. Drain pipes carry waste water, but they do not hold water and are not pressurized like water pipes, so freezing inside drains is not a concern.
Tip #1: Keep the Heat On
If you or your tenants are leaving for a long period of time, make sure that the heat is kept on in your property. It may be difficult to convince your tenants to leave their heat on when they are away, especially if they are responsible for paying their own utility bills. You should inform them that the heat can help prevent pipes from freezing, and if pipes freeze and burst, it can cause a lot of water damage to the property and to their possessions.
The heat does not have to be kept as high as you normally would keep it if you were actually in the property, but keeping it set above 50 F is a good idea. This should provide enough heat to keep the pipes warm and to prevent any water inside from freezing.
Tip #2: Allow the Faucet to Drip
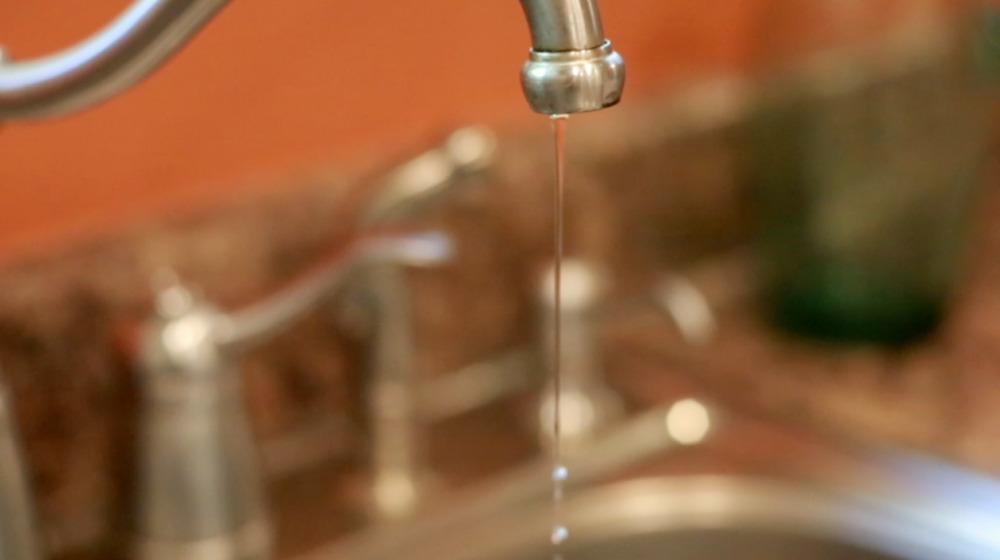
If you are afraid a pipe will freeze, you can open the faucet fed by that pipe just a bit so the faucet drips slightly. Allowing the faucet to be open like this relieves pressure in the system. If a pipe freezes, it is actually the pressure that is created between the blockage and the faucet that will cause the pipe to burst. Allowing the faucet to be open will prevent this pressure from building up and thus keep the pipe from bursting. If the faucet is served by both hot and cold water pipes, open both faucet taps slightly, or set a single-handle faucet (such as a kitchen faucet) to warm.
Tip #3: Keep Interior Doors Open
Pipes are often located in cabinets. When the temperature drops, it is a good idea to keep these cabinet doors open so that the heat from the rest of the house can keep the pipes warm as well. You should also keep all interior doors open so that the heat can flow throughout the home.
Tip #4: Seal up Cracks and Holes
Seal gaps around holes where pipes run through walls or floors, especially where the hole is letting in cold air. Use caulk or spray foam insulation (such as Great Stuff) to fill the gaps. If possible, seal holes on both the interior and exterior side of wall or floor. Cold outdoor air that gets in through holes and gaps can make a cabinet compartment, which is usually pretty cold, even colder.
Tip #5: Apply Heating Tape

Heating tape works like an electric blanket for pipes, supplying heat directly to the pipe to keep it warm curing cold spells. This can be a good solution for short sections of pipe that are at high risk for freezing and are easily accessible so you can install the tape and can monitor it for problems.
There are two types of heating tape. One type turns on and off by itself when it senses heat is needed. The other type must be plugged in when heat is needed and unplugged when not in use; it does not have an automatic or manual on/off switch. Much like a space heater, these products can be dangerous, so you must follow the product’s direction and safety procedures exactly.
Tip #6: Add Extra Insulation
Pipes that are located in areas that do not have proper insulation, such as basements or attics, may need extra insulation to keep from freezing. Pipes in basements or attics are not the only ones that may not be properly insulated from the cold. If you have had a problem with pipes freezing anywhere in your home, extra insulation could be the cure.
Pipes can be fitted with foam rubber or fiberglass sleeves to help decrease the chances of freezing. This can be an easy solution for pipes that are exposed but can get expensive if walls, floors, or ceilings have to be opened in order to properly insulate the pipe. Additional insulation can also be added to walls and ceilings to keep the pipes warm.
Insulation can help keep a pipe closer to the temperature of the water inside the pipe, but it does not add heat to the pipe and will not prevent freezing if the pipe is exposed to prolonged freezing temperatures.
Comments Off on 6 Great Tips to Keep Pipes From Freezing
4 Ways To Adjust Water Level In Toilet Bowl

If the water in your toilet bowl is too high or too low, it is important to find out why and fix the problem. Fortunately, the causes and solutions are generally quite simple, and you probably won’t need to call a plumber – so here are 4 ways to adjust the water level in a toilet bowl.
If you want a few extra tips, you can check out this useful and sometimes amusing video too.

Too High Or Too Low?
The correct way to adjust the water level in your toilet bowl depends on whether it is too high or too low. Let’s look at the different techniques for each situation in turn.
If The Water Level Is Too High…
1. Unclogging pipes
With any kind of flushing toilet, if the water level in your toilet bowl is too high, the chances are that this is due to the pipes being clogged. When you flush your toilet, water can’t flow out as it should and so simply sits in the bowl.
Sometimes, the water level will gradually drop as the water flows out slowly – but with bad blockages, the water will remain in the bowl indefinitely.
Worse, if you continue to flush the toilet, the water will eventually overflow the bowl and toilet seat and end up all over your bathroom floor.
If you suspect this is the problem you are dealing with, there is a quick test you can do. Fill a bucket with water and pour it into the toilet bowl. If the water remains in the toilet bowl without flowing out, it is safe to assume you have a blockage.
To resolve the problem, you can first try putting on a pair of rubber gloves and reaching into the toilet bowl to see if there are any larger items like diapers or tampons blocking the toilet.
If you don’t find anything, the blockage may be further down the pipe, so the next step is to try unblocking it with a plunger.
If the plunger doesn’t do the job, you may consider pouring boiling water into your toilet or using chemical products to unblock it – and if none of these techniques works, it may be time to call in a professional.
If The Water Level Is Too Low…
2. Adjusting the water level in the tank
If the water level in your toilet bowl is too low, there are several possibilities, but the most common reason will be related to what’s going on inside your toilet’s tank, so this is what you should check first.
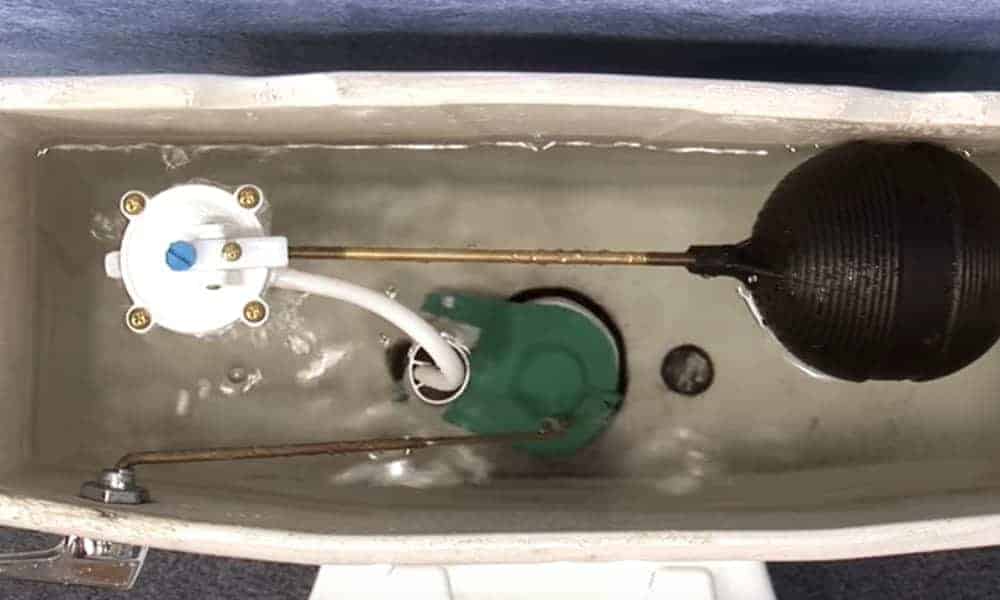
Start by removing the tank lid and setting it aside and check the level of the water in the tank. It should be about an inch below the level of the fill valve and overflow tube, and if it is significantly lower than this, you will need to adjust the water level in the tank.
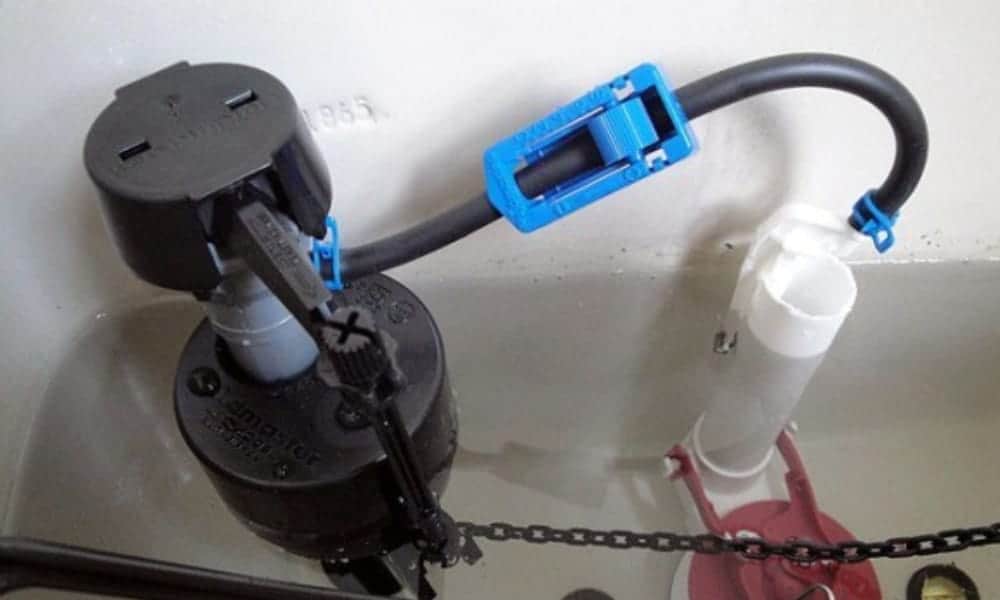
There are several variations on toilet tank mechanisms, but most use a float – either in the form of a ball or a cylinder – to control the level of the water
Whichever type you have, the first step is to turn off the water supply to the toilet. Find the external water valve and close it, then flush the toilet to remove all water from the tank. If the valve is closed correctly, the tank won’t refill again.
If you have a ball version, check that it isn’t damaged. If it is damaged or there is water inside the ball, it will need to be replaced.
If everything looks to be in working order, simply adjust the height of the ball as necessary – there should be a screw that allows you to do this.
Once you have made the necessary adjustments, turn the valve back on, allow the tank to fill, flush the toilet and check to see if the water level is now where it should be.
With a cylinder version, the process is almost identical. To adjust the height of a cylinder float, there should be a screw that you turn to move it up or down. When you have adjusted as necessary, fill the tank and flush to test.
3. Clear the plumbing vents
If the problem doesn’t come from the tank, there could be an issue with the plumbing vents in your home.
In a properly functioning plumbing system, vents allow air in to maintain the correct pressure. If the vents become blocked, air can’t enter, and the water won’t flow properly.
The concept is the same as the old college trick of inserting a straw into a beer bottle when trying to drink it as quickly as possible. The straw allows air to enter the bottle, letting the beer flow out in only a few seconds.
The tell-tale sign that suggests you might have blocked vents is that your toilet gurgles and splutters when you flush another toilet in your home or empty the bathtub.
If this happens, you might try climbing onto your roof and flushing your pipes out with water from a garden hose.
If this is a recurring problem in your home – perhaps due to falling leaves – it might be worth considering investing in some kind of cover for your vents to prevent leaves or other detritus from blocking them again in the future.
4. Cracked toilet
If you can’t find any other reasons for the low water level in your toilet bowl, check for hairline cracks. If you find the water level drops gradually after each flush, this is a sign that you might be dealing with a leak of some kind.
Another giveaway is if you find puddles of water on the floor – although the leak or crack could be below the floor level, so puddles of water won’t always be visible.
If your toilet is cracked or you have any other kind of leak, it is important to fix it as quickly as possible since this can lead to serious structural damage in your home that will be expensive to repair later if you don’t catch it in time.
With this kind of problem, you may find your only option is to replace the whole toilet.
Resolve The Problem Quickly
As with most plumbing issues, the key is identifying the cause early and taking action. If you put the repairs off until later, the problem will only get worse – and you may find you need to spend a lot more money fixing it than if you had taken action when you first noticed the issue.
Comments Off on 4 Ways To Adjust Water Level In Toilet Bowl